The sketches below are some of those generated a few days ago. I didn't post them all since many weren't sketches words and were not legible after scanning. If you click on the images you should get a larger version. I personally like the idea of painting a "still-life" on the hood of the car. We have some flat white Rustoleum that would make a good paint surface, but we'll have to use enamels or oils since our exterior base is enamels and will not be very stable for laytex/arcylic. Oil based would work and then clear-coated. There is also the idea of adding "art quotes" from everyone in inconspicuous areas, either your quotes or from your readings about artists and their work. There was a Lowrider idea; hmmmm. Creating a still life on the tops of the roof with discarded materials from the drawing studio. Those old mannequin parts spray painted a brilliant gold might be nice? We have some florescent colors now (spray); the beads are almost untangled, and the interior is almost 'primed', some activity between now and Tuesday would be a big plus for the cause.


 SEE COMMENTS SECTION
Thinktank II is our current arena for honing a plan of attack. I will see to it that visuals get posted, but you have to see to it that ideas get discussed and executed.
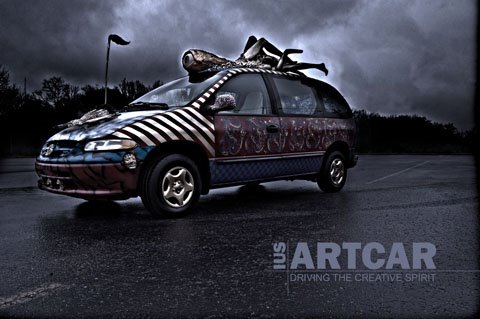
So here we go, the IUSARTCAR is going to be an Artcar. The green theme is abandoned, replaced by a near consensus artists expressing art for the sake of art, in the name of art, and for the love of art.
The second prep phase (wash me was the first) will be Thursday, October 9, from 12:20-1:10 at the same loading dock behind ceramics. We're going to knock that glistening finish off and get it ready for paint, adhesives, and even some interior design considerations. Bring any materials that you feel would expedite the process. Also, take a look at the wikihow website: www.wikihow.com/Create-an-Art-Car, there are some good and valuable tips here for us.
Update: There are some great shots from Steve, but I'm trying to figure out how to present them as a slideshow so they don't take us so much physical space. Maybe I can archive the first batch so the second batch of you all in the studio could be posted in that spot. Lemme see....
OK, let's go......

60 comments:
ooo... paint prep sounds like fun ;). I'll have to come and watch you guys labor over this thing for a while on thursday. Good luck with the new theme.
wow
the new theme should be real challenging!
When doing the prep work, you may also want to remove any chrome/ rubber.
remember...when sanding, DO NOT sand so hard that you take off paint or get down to the primer.
ALL you want to do is rough it up a bit.
Heavy grit sand paper is best
Wear a dust mask
Do it by hand, do not use a power tool
When you are done, you should have a scratched up van
Thanks, scott, for those pointers. We were going to attack it with palm sanders. Someone suggest sanding gloves. I'll look into those. If we avoid the chrome and rubber, do we still need to remove it?
I've done this a few times. Here's my .02
1st:
evaluate the condition of the body and ask yourself a few questions. Is there any rust? Are there dents? If so, how will I go about fixing them? There are lots of methods for doing this, too many to go into any great detail.
You have to have a good base to start from. If you elect to cover up junk with more paint/filler etc. it won't last a month.
Also, consider any future modifications you guys may make. If your design will incorperate adition of other materials you may not need to worry about fixing cosmetics in certain areas.
Once the blemishes are fixed (I assume there may be a few dings that need massaging) you'll need to remove ALL easily accessable exterior items (this can actually be done before or during previous step). These items include trim pieces (if clipped on) bumpers (if not painted body color) headlights, tail lights, hubcaps, etc. Ideally you would remove EVERYTHING including windows but that's excessive in this case. Most of it comes off easy enough. If you run into an issue w/ removing some trim, leave it alone & just tape it carefully prior to sanding to protect it.
The next step is washing, again. It's important to remove ALL dirt, grit, wax, etc. prior to sanding. If you go @ it w/ sand paper while it's dirty you won't be able to properly scuff the surface because the dirt will be a barrier inbetween the sand paper and paint. Dry prior to sanding.
Once the car is clean, make it dirty again... For sanding I prefer to use a combination of tools. The heart of the opperation is my DA (Dual Action) sander. It works the same as any vibrating palm sander except it's air powered and has a variable speed. It can also be used as a high speed rotary sander (that would be the 2nd of the two actions) wich will remove a lot of material quickly. Be mindfull if you choose to use palm sanders. The lack of a variable speed makes them more aggressive than the DA. They are still ok to use, if you're carefull. Sanding blocks are also great. Don't buy those sanding pads or even small sanding blocks. All you need are a few FLAT and STRAIGHT pieces of 2x4, 1x2, paint stirr sticks (in some cases). Wrap the sand paper around these to give you a flat surface to sand with. If you try to just use the palm of your hand you create wavy indentations in the surface of the paint. Just like wiping an intaglio plate. This is especiall important on large flat surfaces like hoods, roofs, door panels, etc. When trying to get into a small area (IE lip of a fender) you can carefully use your fingers to conture the surface. An alternative might be a flexible strip of wood (stir stick) or a dowl rod.
BE MINDFULL OF EDGES/RIDGES!! These are areas that naturally don't have a lot of paint. The tendancy is to sand them down just as hard as other areas. What happens is you quickly find yourself sanding off all the clearcoat, paint, and primer. The trick is to sand upto the edge but never directly on the edge.
Now... how much to sand? What grit to use?:
If doing other, more serious body work (fixing dents, welding new metal on) there are a few extra steps. Those can be explained later if aplicable, I don't think they are in your guy's case.
In general, however, you want to just scuff the surface. To do this I use a 400 grit. Too coarse a grit (FYI the lower the # the more coarse the grit) and you can A: run the risk of going too far and sanding too deep when you don't need to. or B: Create scratches that are too deep for the paint to fill in. A thing to keep in mind is that the paint can only go on so thick. If you have a very deep depression like a dent or scratch the paint won't be able to properly fill that in and you'll always see the scratch. You may be tempted to counter this by adding more paint, too much paint causes runs and lack of adhearance. The paint will flake off shortly after. Also, the surface must be entirly scuffed with ZERO shine. Paint will NOT adhere to the shiny spots. It's useless to just scuff a little here & there & expect the paint to hold everywhere. The paint absolutly needs mechanical adheasion, EVERYWHERE YOU WANT IT TO STICK.
When are you done with the scuffing? When the entire surface to be painted is scuffed uniformly with 400 grit. Go over everything and check all the little spots.
After scuffing is done you need to clean off the debris. I use a air hose or leaf blower if I'm far from the garage. Then wipe the excess w/ mineral spirits until the rag is CLEAN. This will need to be done RIGHT BEFORE PAINTING.
Since I'm not sure exactly how you guys will paint this thing I'll stop the tutorial here. This is a general overview of how the process goes. More specific techniques and processes can be and should be discussed depending on the paint technique.
Excuse the miss spellings and rambling
Wow! That's more than two cents worth of information, Rob. I had no idea this could be so intense. Rob, how about assisting us when you have the opportunity? I was thinking that we would just rough up the surface for now just to get our hands on the van to make a connection with it, feel its personality, meld with its energy. That activity will at the very least be a beginning to the transformation. Once we get it into our studio then we can be much more focused. Unfortunately, the class meeting time is only 50 minutes, although there may be a few who will continue working beyond 1:10. So, I need to get lots of 400 grit sand paper. How about those sanding block that are like sponges? Can those be used? Any dents or dings will probably be covered with something, so we don't need to worry about doing any cosmetic work, we just want to get our canvas ready and it needn't be good quality canvas or linen, maybe burlap. Thanks for stopping by and helping us out, and please stop by Thursday to check on our process and progress.
So do we need to bring anything tomorrow like sand paper or dust masks?
If you have them, bring them. I'll pick up extras as well.
I'm bringing some kind of sander, but no masks. I didn't know there was so much involved in sanding... I'm also bringing paint to leave in the van.
so we need to remove all this stuff and wash it before we can begin sanding... i have a feeling the sanding will not get done tomorrow. are we planning on sanding again the following tuesday? Do we have a better idea yet of when the space will be ready?
Obviously my experience is in the more traditional body repair & paint area. The same basic rules still apply in this case though.
Dealing with a vehicle is a little different than painting on a canvas. This thing, I assume, will be driven, washed, left out in the rain & snow, etc. If you care at all about the longevity of this piece of "art", preparation is a crucial step. 90% of any good paint job or even any good piece of art is in preparation. Otherwise it's pretty much useless to do any prep at all in my opinion.
To do this process it takes me (by myself) two 8hr. days. More people should increase productivity but it may take a while... to do it right.
We're going to sand the dirt off instead of washing it. Since we're not going for a glass finish and most of the surface will be covered with 'stuff', all we need to do at this point is roughen the surface to prepare it for paints and adhesives.
It sounds like you all got a great start on the sanding today. I have assisted in painting several cars. If you would like I can get a few people started on taping the rubber trim around the windows.
I assume that we are painting over the side windows and covering the rear window and windshield with newspaper right before we paint. There is no need to start taping and papering until the van is parked in the studio.
I am available Sunday morning if we can get in to the studio. Let me know!
Hey! I still think it would be a really good idea to make a car template to print out, and spend a class period coming up with 20 designs. Otherwise, how are we going to come up with a design everyone likes? Or are we just going to freestyle it?
Pascalle's suggestion about a template is a pretty good idea. Can any of you graphic design folks put one together by Tuesday? Just an line image of the front, back, and sides. If you can send it to me, I can have some larger copies made at Kinkos. I'll also look through the photos I shot on wash me day to see if there's something in there that can be used.
So... we're doing an art car... that's our theme... Now we need a direction. Many things have been said, such as: each of us take a section and devote it to our own style; we do an art timeline; we recreate masterpieces. All good ideas... but we need to discuss these options and move forward.
What if we choose a specific era in art and stick to it. That way everything on the car flows together nicely and we can worry a little less about it becoming "junky."
For example, we choose something like expressionism and paint the car up in that style. I understand something like this may be difficult for us to do because everyone has different tastes and styles... I'm just trying to get the discussion going.
Thanks, Adam, for throwing something out there. I posted the Art Car Central blog that is loaded with tons of cars to help find the inspiration to get things rolling. I think one thing we can do is to get rid of the "junk pile" strain of thought that permeates our thinking. The Pen Guy has created a car covered with pens, all kinds, and that seems to relate to his world as a designer. He's also given us a big plug so I suspect we'll have folks checking in on our progress. He's been working on hi pen car for a few years, and we have a few months. Has anyone out there created a template to generate design possibilities?
On the Think Tank that was generated in Sept. someone had submitted a template of the van covered with IU logos. That would be a great template to use if we could get it blank! Brian, do you know who gave that to you?
Who did the template that laurel is asking about. That would be good if we could get it blank; c'mon, fess up.
I might be a minority, but with these art cars, I prefer the ones that have a repeating pattern/texture over the whole car. Looking in the book that was passed around in class a long time ago, the one I liked most was the convertible covered in pennies. I also like the way the 21C cars are done. Does anyone else feel this way?
I'm with Jaimie. I think the repetitious pattern is striking from afar and up close.
Can't we all work together on one cohesive design? I'm scared to death that we are going to do an art car with 20 separate panels, completed separately by 20 different artists.
Whatever we do...I hope we can decide on ONE design and attack it together!!
BTW...I'm ok with Adam's idea to pick a historical period. But, I still think we should focus on one design from that period. I like Art Nouveau.
How about if we combine Jaimie and Adam's ideas and create a Serat design similar to pointellism.
Jamie and Laurel make a good point about a cohesive design. Repetition is a staple of good design. What can we get a lot of ? The Pen Guy covered his car with pens, looks pretty cool. Again, check some of the cars on that site, there's a lot there to consider. Still haven't heard from the person who did that template to see about getting a blank one, but will continue to dig. They came in often as email attachments, so I'll check my email archives.
Yes I really like the idea of a cohesive design with Art nouveau or something of the like, where we could use pieces of glass or something else along those lines to make something. Texture and design, something that will flow together. And say we use something like mosaic glass or some other thing, that doesn't mean we can't still use the paint.
I really like the idea of going with a time period. I was wondering though if we are going to go w ith a piece of art from that time period and reinterprete it, as we had some suggest in the beginning of the semester, or are we going to go with a pattern or a design, that is somewhat abstract, yet still relative to the period?
i don't see a reason to reproduce a famous piece of art on the back window, or anywhere else. seems like there would be a more creative use of the glasswork people are itching to use. what if we covered the car in something relevant to the area or just something cool that has nothing to do with anything.
Yeah, but it's a well-known piece of art...I think it would look awesome, as well as help establish the vehicle as having an "art" theme.
just reminds me of refrigerator magnets you buy in gift shops . . .
Holy Crap! We actually made progress today! The fact that we were able to vote on ideas quickly and out loud was/is great. I'm eager to see how the ceramic faces will look. I forgot a lot of the other decisions we made...Brian, are you going to post everyones sketches from class today? Progress, progress, progress!
I'm jazzed about this stained-glass window.
im almost done with the rendering of the back glass window. ill e-mail it to brian as soon as i finish it so he can upload it.
oh and it definately wont look anything like a cheap ass refrigerator magnet.
-Brent
We could do some interesting things with refrigerator magnets. I've got some Michaelangelo's David, with all the extra attire, and the Botticelli Venus, David looks great in Venus' leather skirt. I'll post Brent's glass.
I've posted Brent's back window. I, too, am jazzed about the stained glass; it's pretty pretty, and it's a major chunk. The question I have is how to make it still be a beautiful work of stained glass but with less emphasis on the history of art. What if the cypress was eliminated and maybe a couple more of those yellow circular shapes were included. May become a homage to Van Gogh, without being too much like Van Gogh. Besides, you can never go wrong with Yellow. Or, what if it had the Colgate Palmalive (sp?) Clock in it, or just part of it, like the top half? Or anything that places it in our place and in our time.
Wow... AWESOME job brent on the glass. I think that will be a nice addition. It will be interesting to unify all of the different mediums to create a somewhat cohesive work of ART!
So is there anyway we can kind of see when people are going to work on the car? Because I have a 1:15-4:15 class right after our seminar meets and before it, I work...
sounds like fun....
-think long and hard before painting
-no plan sounds fun but later it gets messy.
-A good time is now to consider hardware. These days I lean toward removable objects rather than perminent. Perminent ones break fade are vandalized Magnets do work well but have long term maintenance issues. My favorite solution these days is attaching bolts to threaded rods. They have to be bolted on to the surface- big washer nut under and on top. Once that is done you drill the object to be attached and slip it over the rod and put a nut and washer on it to hold it together. The rods can be varried lengths and anywhere you can bolt them. Because you are making holes in the fabric use butyl rubber washers-see home depot- under the washer above car surface-these have to be an exact fit to washer and bolt. So you dont want that sculpture any more you just loosten the bolt on the top and slip it off and replace it with another. So install anything like this before you paint. Another way to the same end is to use plastic- sturdy jar lids. I have used peanut butter plastic bottles. Cut the jar off the threads leaving an inch or so of body under the threads. Drill hole into screw on lid. Insert bolt through lid and anchor with nut an washer inside and out. Glue top of bottle on to car surface. I use goop or liquid nails heavy duty construction contractor large tubes. Let this set up. Then mount your object on the bolt and screw the lid on the top of the jar onto the car. Want another sculpture just unscrew the lid with sculpture attached.....
Hsve fun...!
Conrad
Gosh, thanks, Conrad. We'll put that into our info-bank, I think it'll be a good investment later on when we start getting things attached. Thanks for stopping by.
Hey, guys, check this out:
http://www.psychicreform.com/art/artcar.htm
Pretty nice!
I'm psyched about getting started on the artcar! I'll talk the carpet store manager Friday.(now that i have the measurements)
I'm soliciting to Home Depot, Lowe's & K-I Lumber for white paint, E6000 clear silicone adhesive, and black grout.
I'd like to start getting bigger blocks of time to work on the artcar. Can we start working weekends? What do we have to do to get in?
You can pretty much get in anytime, there are doors all over...it's just a matter of navigating the labyrinth down to the garage. Feel free to get the rest of those beads untangled!!
Where are all the sketches? We should probably start discussing what else to do with the exterior.
I'll try to get some of the sketches posted tomorrow, but there is still a lot of prep work to do. I just spent a few hours over there painting the tires/rims black and will spiral them tomorrow, I hope. Scott and I also did more sanding as he thought the finish was too smooth, apparently we did too good of a job on sanding day. I also worked a little on the interior, second coating some areas and first coating others. Doing this prep work is pretty important and we need to think through what we're doing. I had to scrape the primer paint off the door and window gaskets, so please be more mindful about what should get prepped and what shouldn't. It's just a matter of thinking it through. Laurel brought the carpet by and it's a pretty thin felt-like material. We'll need to consider how to install that. I am going to try to go by about noon-ish tomorrow to make some more progress, hope some of your can make it. I'm not sure how long I can stay as I may need to work some on my installation at Galerie Hertz, don't forget I have an opening on Sunday from 1:00-4:00.
I went to Mellwood Saturday to start on painting the van white.
Ideally after sanding... the van should have been washed again before the tape was applied. Since the taping has already been started, I guess there is no going back.
I finished taping off the van and wiped the exterior down with mineral spirits. I didn't have a ladder with me, so the roof is the only part I could not reach. Someone will need to wipe the roof down with mineral spirits before it can painted.
I painted about 2/3 of the van white. The only part I couldn't finish was the roof and the passenger side! I ran out of time...
I applied the paint with a roller. I tried to roll all the way to the edges. The trim still needs to be done with a brush. Unfortunately, brushes leave brush marks. But they will have to be used to trim.
Brian bought us some white Rustoleum. I think that the coverage is good for one coat. Especially if we are going to paint over it or cover it with "stuff." Everyone needs to go to Mellwood and take a look so we can decide as a group if we want to apply a second coat. There is plenty of paint left over!
Here's my two cents...
Doorjambs should have been discussed before the sanding began. I would prefer not to paint them. They are a long, tedious, pain in the ass! If we're going to paint them they all need to be sanded! Some were sanded, and some were not... then someone,who knows how, needs to use a lot of tape and newspaper to cover each door opening. They will need to be sprayed with white Rustoleum.
It is a lot of work, but it would be much easier if 6-10 people tackled it all at once!
I did not paint any of the plastic trim or mirrors. There is a special spray paint made for plastic. Two cans will probably be enough. If we use the paint we have, it is likely to peel off.
I think a still life on the front might be kinda tacky. What about something more abstract?
Brent and Laurel will be meeting @ Mellwood Tuesday morning around 8am. Anybody that thinks they have a couple hours to work please come. We need to finish painting the van inside and out. Also we have a lot of glass to cut and prepare for the mosaic.
if you just want to paint the door jams, they don't have to be sanded, you can just rub them with a green scotch brite pad and then paint. this is how body shops do it every day. also if you want to clean areas before painting, windex works well and doesn't leave any deposits to mess up paint adhesion.
You know, this is your project. If you don't want a still-life on the hood because it looks tacky, come up with an idea for that space that isn't tacky. If it's an "abstract" let's see it. I'm throwing ideas out there to see if there might be takers or if there might be someone who has an idea to the contrary. Instead of just criticizing, have an alternative idea worth pursuing. There was an idea/sketch about doing images from your development in studio classes. Even one that has a still-life on the hood. Well, that was an idea and I expanded it, if you want to adhere images from your past classes, do that. If the still- life on the hood is not an idea that's worth pursuing, have something that is.
Thanks, Laurel, for going over and making the project move forward, I'm looking forward to seeing that actual progress, and thanks for emailing the images to me. It's the first time I've ever received an emailed image in my phone, my phone even (rang) played new music that I've never heard. That progress looked good on the phone.
lets strip all the paint off the whole car and polish the metal so it looks like chrome then clear coat it. you will need sunglasses to look at it.
I did actually come up with an idea, it's in the sketches. Do a still life, I don't care.
It would be helpful if everyone cared. My comment about the still life on the hood had to do with the discussions during class about actually attaching some of the work you've all done in studio classes, drawings, paintings, graphics, etc. Treating the hood like a canvas was an idea worth looking at, but if the "abstraction" is to pin-stripe a design, that is also fine. The hood is about ready for whatever you all decided, but please care about what you're doing, it will make your work better and stronger in the community dynamic.
i'll be at mellwood at noon tomorrow w/3 more cans of paint.
If anyone can, PLEASE contact me about carpooling to Mellwood, I would be willing to come in early if that's the only ride I can get. My car completely ran out of gas on Tuesday and I had to walk about a quarter a mile or more to get home. (Not fun) Anyways, I was able to put enough gas in it to get it home, but not much more. It's an old gas hog and I really can't afford a round trip into Louisville right now. I can get myself to IUS if need be to get a ride with one of you guys, but I need to know the ifs and whens. Please email me at sizzlinsarrah@yahoo.com or call me at (812)981-3938. Thank you.
A few of us are going to Mellwood this Saturday. If anyone wants to join us we'll be there around 1:30 or 2.
Also, I am not sure what needs to be done. Does anyone have any suggestions?
Yeah, I have suggestions, but it sure would be nice if you all presented yours. You've been provided with all kinds of resources for getting inspiration from day one (websites, books, videos, this blog with added videos, and with links to artcar central, etc) I also gave the dates of the Jefferson county junk days (that's how I found the beads), but there have been no contributions for the most part to the treasure pile. If we have some things to play around with, it'll make the creative juices flow more freely. How about if some of the painters in the crew started painting the Steampunk interior. Trompe l'Oeil gauges and buttons, pseudo-mechanical imagery, look at Victorian imagery as there might be some ideas there for expanding the cockpit of the interior. Even if you just started painting the interior a color would help get you motivated and inspired.
!!!Steam Punk Cockpit Update!!!
Pascalle and I have been thrashing the local salvation armies, goodwills, and flea markets scouring for potential steam punk goodies. Today was especially successful! The best thing by far we found was an old school barbie hairstyling model...thing. Our plan is to finger wave her hair, spray paint her gold, glue cogs and junk to her and mount her on the dashboard as a "G.P.S". Awesome town.
Also!!! If you have a favorite piece of poetry or quote, let either Pascalle or I know, as the theme for the seat covers is going to be coffee stains and written words. I am in the process of hemming them at the moment, as well as attaching the tie-downs. After that we will be painting them...
*** the shout out for weird old clock bits, watches, cogs, knobs, typewriter buttons, vaccuum cleaner hoses etc. is still in effect! Here are some examples of Steam punk, for those who are still curious:
http://en.wikipedia.org/wiki/Steampunk
...think Jules Verne, Disney's "Atlantis", "The Rocketeer", and most especially "Metropolis".
~Sam
I can not work at Mellwood on Saturday. I will be there working on Sunday though. Can anybody else come up there on Sunday? I will also be there on Tuesday morning.
I will bring in some things for the still life on Sunday.
Great job, Sam and Pasqualle. I look forward to seeing how it all comes together. I've found another stash of pencils,pens, etc. I'll be at Manual High School today for portfolios reviews, but will get by late this afternoon or tomorrow. Happy Halloween!
Great job, Sam and Pasqualle. I look forward to seeing how it all comes together. I've found another stash of pencils,pens, etc. I'll be at Manual High School today for portfolios reviews, but will get by late this afternoon or tomorrow. Happy Halloween!
I was in Sunday to work on the rear window and I noticed that the side mirrors had not been touched. Are the side mirrors spoken for?
I'd like to repeat the star/swirl pattern from the Starry, Starry Night rear window on the outside of the side mirrors. I will be in Tuesday morning to get started. If anyone has any objections please blog back and let me know!
I will also be bringing in the grout and the sealer for the mosaic. In addition, I got a can of expanding foam for Ben to use for a shock absorber inside the ceramic faces, and a can of liquid nails for anyone who needs it.
I have an old brass, engraved vase I will bring in. If you don't want it for the still-life, then I thought that Sam and Pasqualle might want it for the interior.
DON"T FORGET TO VOTE BEFORE YOU COME IN TO WORK ON TUESDAY!!!
The side mirrors are done (I think), that's why they're covered with plastic. Although I have some rhinestones that might get added to the diamond mirror. Debra and I also picked up some adhesives on Saturday. Debra also has several cans of foam and chicken wire and is working on a sort of cyclops eye that will go in the middle of the roof just above the window, where the dent appeared in the last week or so. It will be a sculptural element that we need Scott to help us figure out how to get it attached.
YES, please vote early tomorrow so we can all be at Mellwood at the same time, otherwise you'll have to go afterwards and the lines may be even bigger by then.
I went back to Mellwood and worked on the rear window from 3-4pm & 7-9pm today. It is nearly complete. It should be ready to grout next week and possibly seal by Tuesday, Nov.11th!
I have an idea for the interior... everyone could bring 2 images of their original artwork in 2 small frames(no bigger than 3x5). The frames could be mounted somewhere inside the van. This could be a way to further personalize the van!
40 small framed pieces of our original art would make quite an impact!
Especially those little brassy metal frames. They could cover the ceiling.
Post a Comment